WaterCar

WaterCar Tech Talk · Season 1

WaterCar Tech Talk: owner how-to videos

Short videos from the WaterCar shop on driving, boating, caring for and shipping your WaterCar. Each episode sums up what the video covers and links to the full video on YouTube.

These videos were filmed on the WaterCar EV. Equipment and part locations can differ by model and options, so keep your owner's manual (PDF) handy and ask us if anything looks different on yours.

Getting started

Episode 1

Your first drive: land, water and back

The complete walkthrough. It covers powering on, raising and lowering the wheels, the dash layout, driving on land, going into the water, getting on plane and driving back out.

  • Turn on both batteries first (the 12 volt under the rear seat and the main battery under the front footwell floor), then flip the two red master switches beside the driver's seat.
  • Two rocker switches on the dash move the wheels: the left one moves the front wheels, the right one the rear. Hold the switch until the pump tone changes. Each cycle takes about 20 seconds.
  • Road controls are on the right side of the dash. Marine controls, including the Mercury key and safety lanyard, are on the left.
  • Into the water: drive straight in, never at an angle. Once afloat, lower the outboard and start it (never run it dry). Move a safe distance from shore, straighten the wheels, then raise the rear wheels and then the front.
  • Coming out: line up straight with the ramp, lower the front wheels and then the rear, trim the outboard partway up, and set the land motor to forward. Once the wheels have traction, shut off the outboard and drive up.
Watch on YouTube (6:12) (opens in a new tab)

Canopy and towing

Episode 2

Opening your canopy

How to raise the canopy from the low position it usually arrives in.

  • Pop the release, stand the frame up and set it in its regular position. If it feels tight, a little wiggle frees it.
  • Unzip and remove the cover bag, unroll the straps and fold the canopy open.
  • Set the bars at 24 inches (the spot is marked for you), tighten them, then pull down to fasten the strap.
Watch on YouTube (1:48) (opens in a new tab)

Episode 3

Closing your canopy

How to fold the canopy down and zip it into its cover. One person can do it.

  • Pull down to take the pressure off the strap, then undo the clasp.
  • Loosen the bars and slide them down. Both are set at 24 inches, so putting it back up is easy.
  • Gather the fabric, slip the zippered cover over the top and zip it closed.
Watch on YouTube (1:42) (opens in a new tab)

Episode 4

Canopy in tow mode

A second, lower mounting position for the folded canopy.

  • Use it for towing, for a trailer, or to fit in a garage.
  • Release the frame, move it to the second location and snap it in. It sits lower and hugs the motor.
Watch on YouTube (0:37) (opens in a new tab)

Episode 5

Tow mode hydraulic support

Installing the hydraulic supports for towing.

  • First make sure the area is clear and you can see the bottom of the support, so nothing gets pinched.
  • Slide the support up into place, put the pin in and clamp it.
Watch on YouTube (0:27) (opens in a new tab)

On the water

Episode 6

Turning on the depth finder

How to switch on the depth finder and fish finder on the Simrad display with Mercury VesselView.

  • Tap the grid icon, then Settings, and make sure System is selected.
  • Go to Advanced, then Features, and check both StructureScan and Echo.
  • Echo and side scan now appear on the main screen, and the depth shows at the top.
Watch on YouTube (1:15) (opens in a new tab)

Care and maintenance

Episode 7

Wash and WD-40 after every use

The full after-use routine, shown after a day in salt water: flush the outboard, wash, rinse, then protect the metal with WD-40. It takes about 15 to 20 minutes.

  • Flush the outboard with fresh water. Connect a garden hose to the flush port and turn the water on before you start the motor. Check for the stream of water, run it in neutral for the time Mercury recommends, then refit the yellow O-ring and black cap.
  • Pull the rear bilge drain plug while you wash, and put it back before you go in the water.
  • Rinse, then cover everything in soap (a foam cannon on a pressure washer helps; a garden hose works too). Spend extra time on the rear hubs, lug nuts, front suspension, axles and hydraulics.
  • Do not flood the dash and electronics. Mist them or wipe them by hand.
  • After the final rinse, spray WD-40 on the metal parts: suspension, hydraulics, hubs, lug nuts, hinges and cleats. Use more if the boat will be stored. The video shows where to be careful around the brakes.
Watch on YouTube (13:37) (opens in a new tab)

Episode 8

Grease zerk locations

Where all 10 grease zerks are on the WaterCar EV.

  • Two at the differential, under the center step hatch.
  • One in each front wheel, in the knuckle on top behind the wheel.
  • Three at each rear wheel: one on the swing arm pivot and two on the wheel hub.
Watch on YouTube (3:59) (opens in a new tab)

Episode 9

Parking brake adjustment

How to reset and tighten the parking brake cable.

  • Start by backing the adjustment knob on the handle fully off.
  • At the rear, loosen the large nut, pull the cable through until there is no slack and no drag on the wheel, then tighten the nut.
  • The lever works in both directions, so set the cable with the lever at zero. Fine tune with the knob, then do the other side.
Watch on YouTube (3:54) (opens in a new tab)

Episode 10

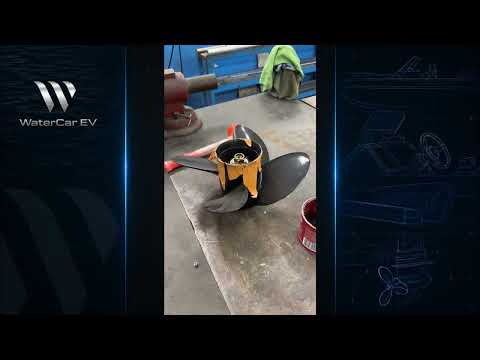
Prop hub install

Fitting the hub into the propeller and mounting it.

  • Grease the hub so it slides in. Grease comes in a bag with the part.
  • Tap it home with a dead blow hammer until it sits against the washer.
  • Fit the cone-shaped pieces the right way round, slide the prop on, add the locking washer and nut, then bend the tabs up against the nut so it cannot back off.
Watch on YouTube (1:23) (opens in a new tab)

Shipping

Episode 11

Shipping your WaterCar

How to shut off all power before your WaterCar is shipped, and how to turn it back on.

  • Turn the key off and switch both main battery switches off.
  • Press the off button on the 12 volt battery. Hold the button on the main battery (48 or 72 volt, depending on options) for 3 seconds until the light flashes.
  • To turn it back on, press both battery buttons, switch the two switches on and turn the key on.

Watch on YouTube (1:03) (opens in a new tab)

More for owners

Want a topic covered in the next episode? Send us your question.